In today’s digital landscape, online security is paramount. For WordPress blog owners, ensuring that your website is not only accessible but also safe for visitors is a top priority. That’s where SSL (Secure Sockets Layer) certificates come into play, and when you pair SSL with the capabilities of Cloudflare, you’re stepping into a realm of security that can transform your WordPress blog into a safer and more trustworthy online haven.

SSL by Cloudflare: Transforming WordPress Blogs into Safer – Anil Labs
Cloudflare, a global leader in web security and performance optimization, offers an exceptional solution for fortifying your WordPress blog with SSL encryption. Beyond just ensuring secure data transmission, Cloudflare SSL brings a multitude of benefits to the table – from boosting your website’s ranking on search engines to enhancing the overall user experience.
In this comprehensive guide, we will delve into the world of “SSL by Cloudflare” for WordPress blogs. We’ll explore what SSL is, why it’s crucial, and how the integration with Cloudflare can provide an extra layer of security and trustworthiness to your blog. By the end of this article, you’ll not only understand the importance of SSL but also have the knowledge to implement it effectively, ensuring that your WordPress blog becomes a safer and more secure digital space for your audience. Let’s embark on this journey toward a more secure online presence together.
1. Sign up for Cloudflare:
Go to the Cloudflare website (https://www.cloudflare.com/) and sign up for an account with your email address and a secure password.
2. Add your website to Cloudflare:
After signing up, log in to your Cloudflare account.
Click the “+ Add a Site” button in your Cloudflare dashboard.
Enter “www.anillabs.com” as your website’s domain name and follow the prompts to add it.
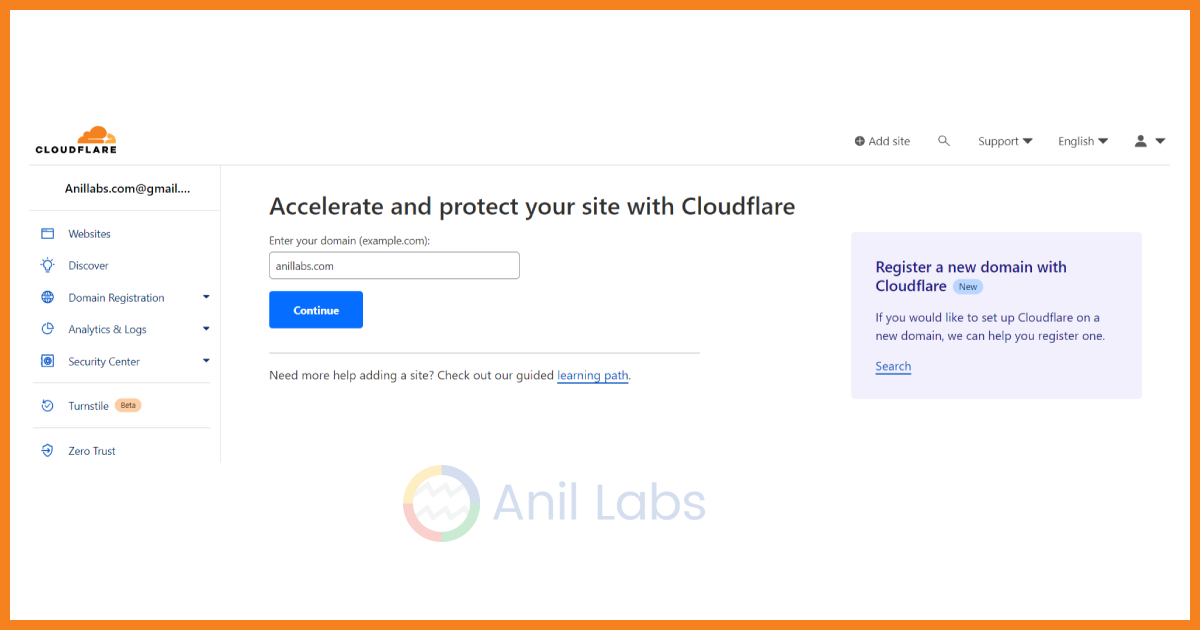
SSL by Cloudflare: Transforming WordPress Blogs into Safer – Add your website to Cloudflare | Anil Labs
3. Choose a Cloudflare plan:
For Anil Labs, select the free plan initially, as it offers basic security and SSL features.
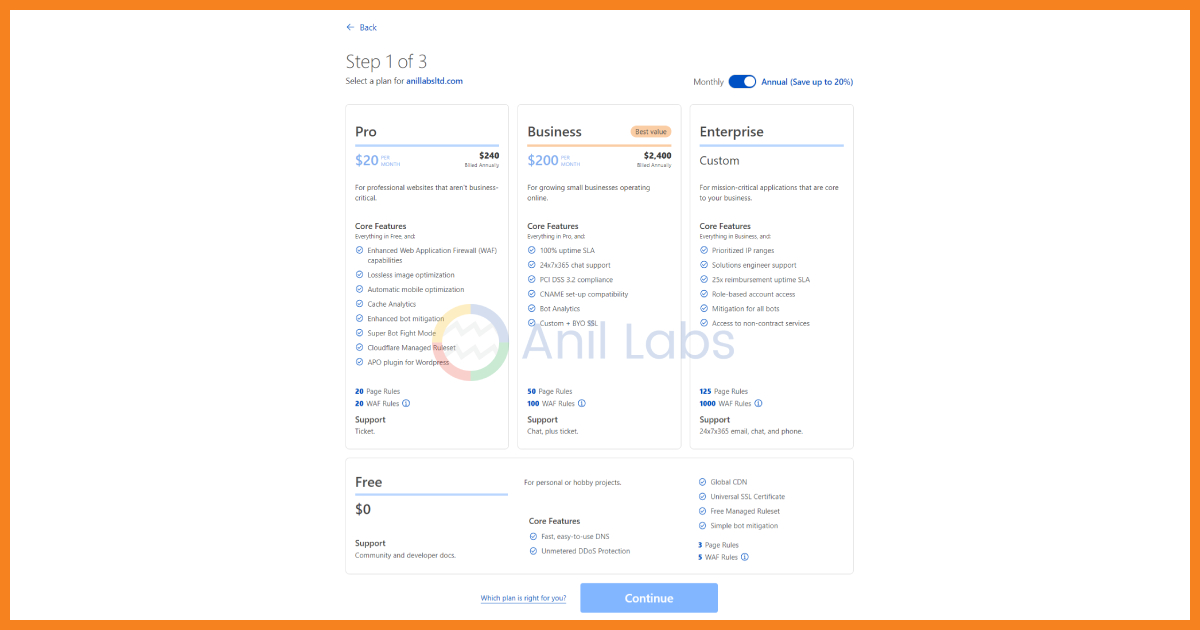
SSL by Cloudflare: Transforming WordPress Blogs into Safer – Choose a Cloudflare plan | Anil Labs
4. Verify DNS records:
Cloudflare will scan the DNS records for “www.anillabs.com” and ensure they match your existing setup. Make any necessary corrections.
5. Update your domain’s nameservers:
Cloudflare will provide you with two nameservers. Log in to your domain registrar’s account (e.g., GoDaddy) and update the nameservers for “anillabs.com” to the ones provided by Cloudflare.
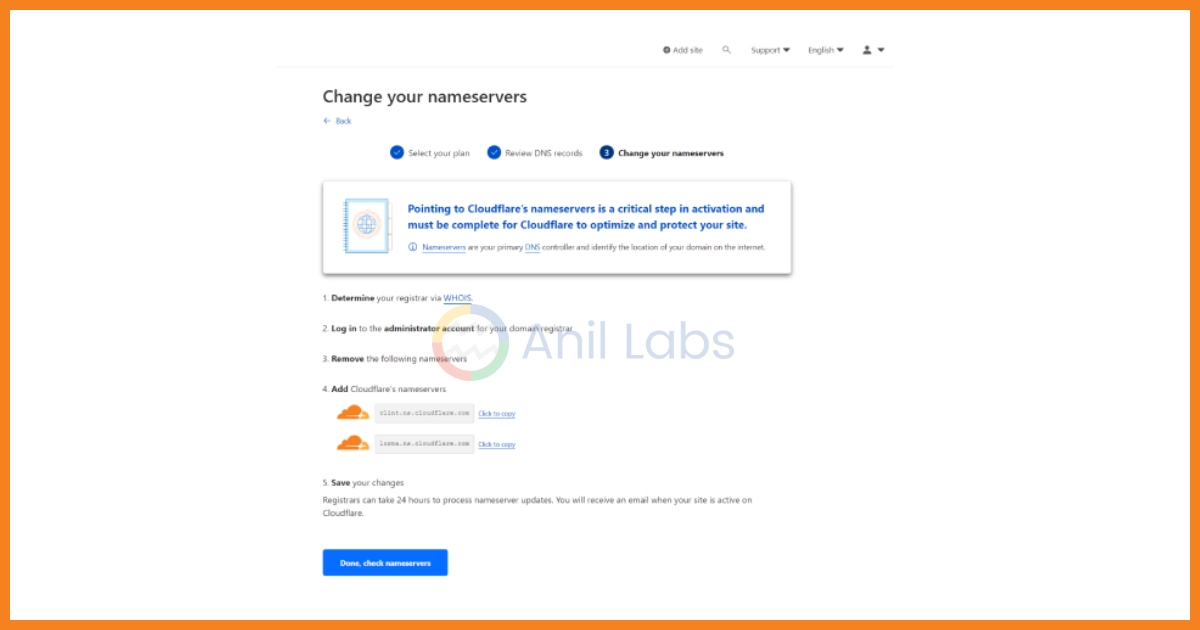
SSL by Cloudflare: Transforming WordPress Blogs into Safer – Verify DNS records & Update your domain’s nameservers | Anil Labs
6. Wait for DNS propagation:
Be patient as DNS changes may take up to 24-48 hours to propagate globally.
7. Enable SSL/TLS in Cloudflare:
In your Cloudflare dashboard, go to the “SSL/TLS” tab.
Choose an SSL/TLS encryption mode based on their needs:
“Flexible”: Encrypts the connection between the visitor and Cloudflare but not between Cloudflare and the origin server (WordPress site). Use this if their server doesn’t support HTTPS.
“Full”: Encrypts the connection between the visitor and Cloudflare and also between Cloudflare and the origin server. Use this if their server has a self-signed certificate or a certificate from a certificate authority.
“Full (Strict)”: The same as “Full,” but enforces a valid SSL certificate on the origin server. Use this if their server has a valid SSL certificate.
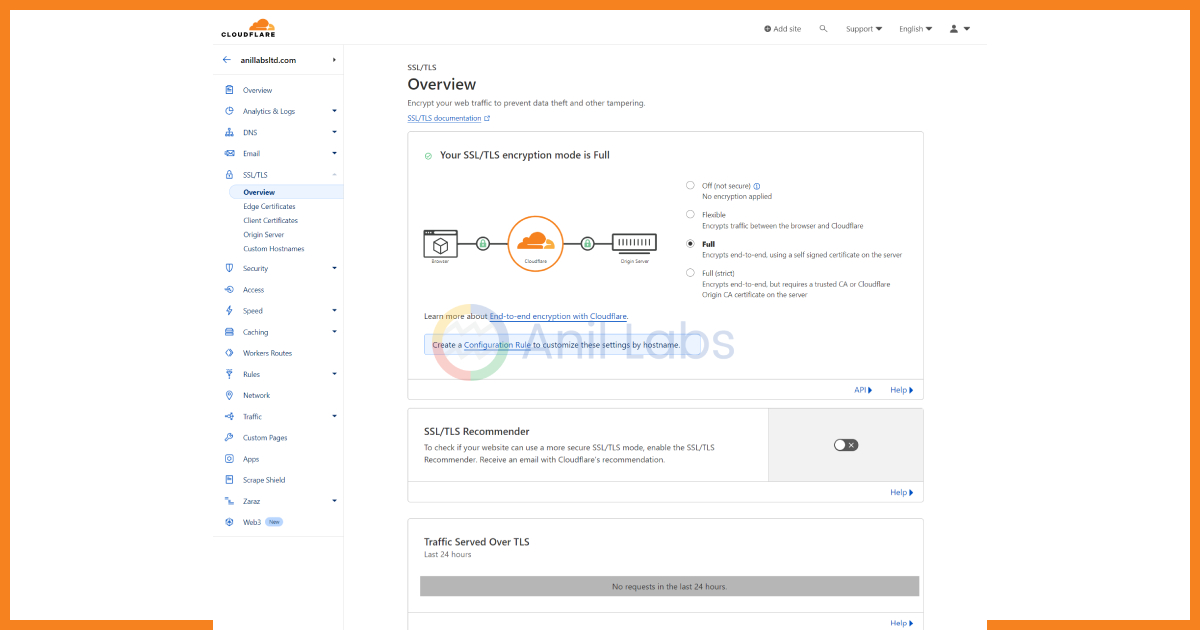
SSL by Cloudflare: Transforming WordPress Blogs into Safer – Enable SSL/TLS in Cloudflare | Anil Labs
8. Update WordPress settings:
In the WordPress admin dashboard, go to “Settings” > “General.”
Ensure that both “WordPress Address (URL)” and “Site Address (URL)” start with “https://” to reflect the SSL setup.
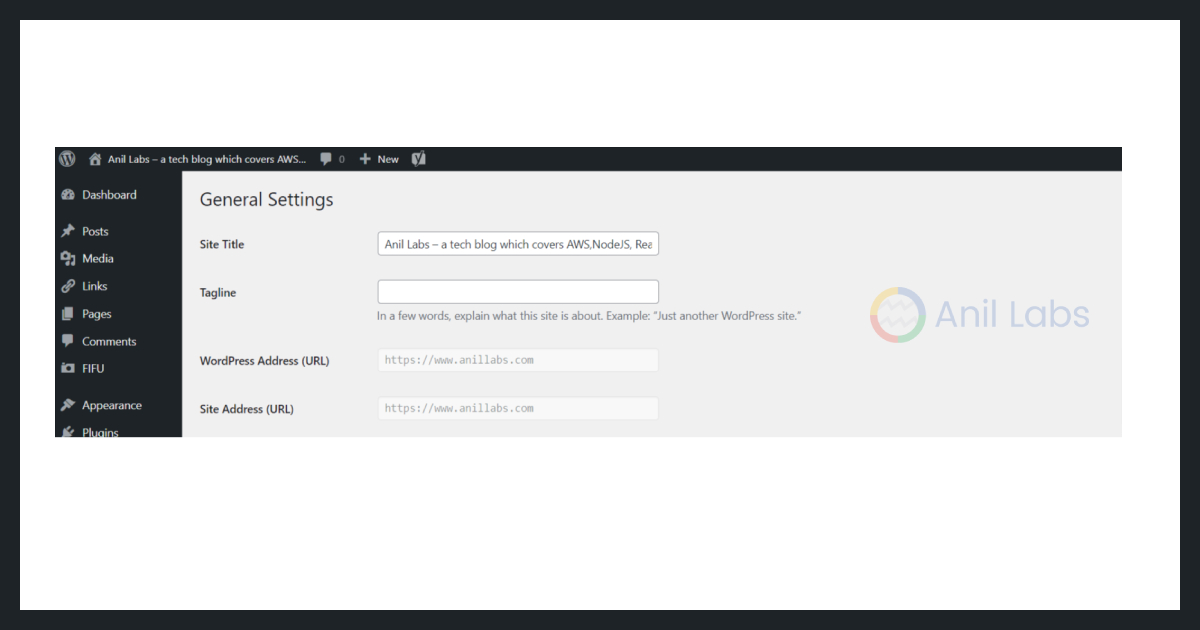
SSL by Cloudflare: Transforming WordPress Blogs into Safer – Update WordPress settings | Anil Labs
9. Test your SSL certificate:
Visit “https://www.anillabs.com” to confirm that the SSL certificate is active and working correctly.
10. Enable Always Use HTTPS:
In your Cloudflare dashboard, go to “Edge Certificates” under the “SSL/TLS” tab.
Enable “Always Use HTTPS.”
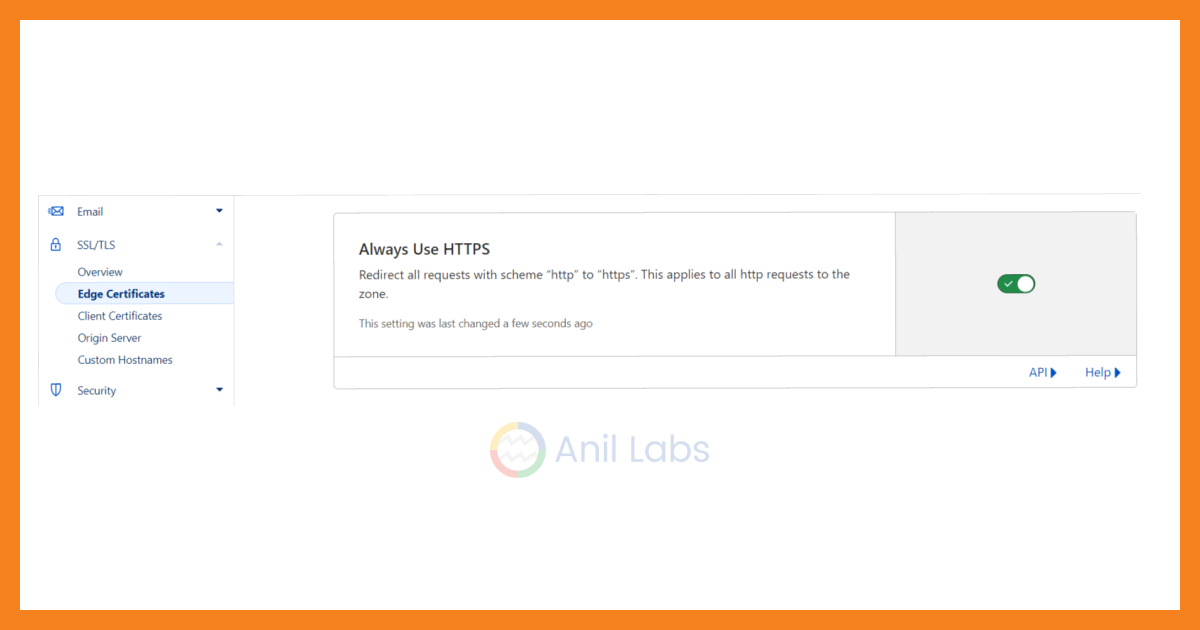
SSL by Cloudflare: Transforming WordPress Blogs into Safer – Enable Always Use HTTPS | Anil Labs
11. Configure security settings (optional):
Explore Cloudflare’s security settings to set up firewall rules, rate limiting, and security challenges as needed to protect the Anil Labs website from threats.
12. Monitor and optimize:
Regularly check your Cloudflare dashboard for performance and security insights.
Adjust settings as needed to optimize the website’s performance and security.
By following these steps, “Anil Labs” has successfully transformed their WordPress blog into a safer platform with SSL protection provided by Cloudflare. This helps protect the website and user data while improving performance and security.
Are you interested in reaching a tech-savvy audience? Consider advertising with Anil Labs. Learn more about our advertising opportunities by visiting our Advertise with Anil Labs page. Partner with us to showcase your products or services to our engaged and tech-focused readership.


1 Comment
HTTPS for Anil Labs Blogspot domain - Anil Labs · November 1, 2023 at 2:27 pm
[…] browsing experience for your audience. In this article, we will explore the process of implementing HTTPS for your Anil Labs Blogspot domain. By the end of this guide, you’ll have a secure and trusted […]