In the earlier post, created the node.js sample application. Now we will learn how to deploy your node.js application to Heroku.
Installation process I have checked in Ubuntu system.

Deploy Node.js application to Heroku by Anil Kumar Panigrahi
Prerequisites of Heroku
To deploy to Heroku, we need to push our application code to remote repository.
Step 1: We need download and install Heroku toolbelt by below command.
1 | wget -O- https://toolbelt.heroku.com/install-ubuntu.sh | sh |
Step 2: To verify that your installation is successful, run the following command in your terminal
1 | heroku --version |
Output:
1 2 | heroku-toolbelt/3.43.9 (x86_64-linux-gnu) ruby/2.3.1 heroku-cli/5.2.39-010a227 (linux-amd64) go1.6.2 |
Step 3: Once toolbelt is running, then log in and use it
1 2 3 | heroku login Email : Password: |
Deploying to Heroku
Create New App in Heroku, App name and select the region. In few seconds your app will ready.
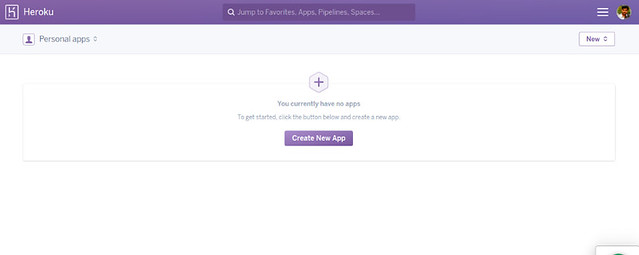
Create application in heroku screen1

Create application in Heroku screen2
Go to settings page and get the Git URL.
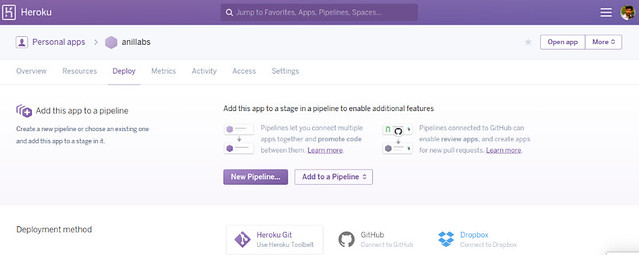
Application in Heroku
Run the below commands in your terminal
Step 1:
1 2 | mkdir [APP Folder] cd [APP Folder] |
[APP Folder] – specify your application name
Step 2: Initialise the Git
1 | git init |
Step 3: Add the remote Git repository application
1 | heroku git:remote -a anillabs |
Step 4: Check the versions
1 2 3 | node -v npm -v git --version |
Step 5: Create Procfile file with below content
1 | web: node app.js |
Step 6: To add files to Git
1 | git add . |
Step 7: To commit with message to Git
1 | git commit -am "anillabs first commit" |
Step 8: To push files to Heroku
1 | git push heroku master |
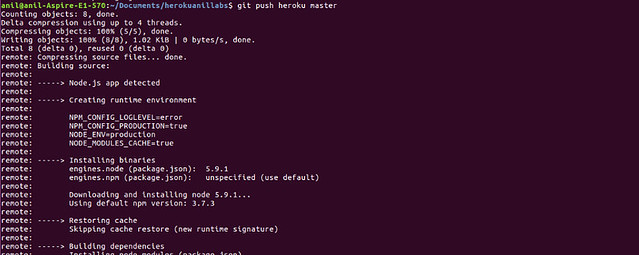
Deployment screen-1
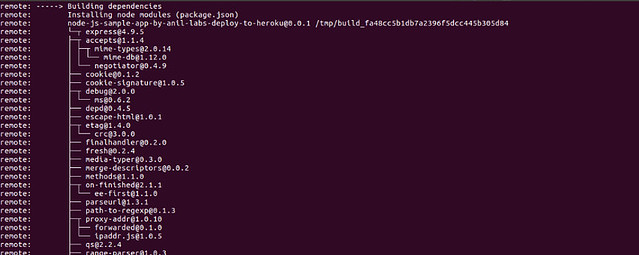
Deployment screen-2
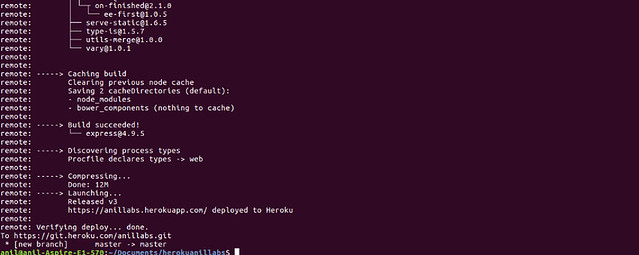
Deployment screen-3
Once you have done this process, Heroku starts building our application and deploys as well. After deployment is finished then your application will be accessible at https://anillabs.herokuapp.com/


2 Comments
Maintenance page for Heroku hosted applications - Anil Labs · June 20, 2019 at 9:19 am
[…] All, In this post, I am going to explain how to place the maintenance page for Heroku hosted applications. The example we have application and hosted in Heroku. Now we want to do some […]
How to create or generate QR code using Node.js - Anil Labs · July 1, 2020 at 11:04 pm
[…] this post I would like to explain about how to create or generate the QR code using Node.js with dynamic data. It is simple code to generate the code, but it will help in many of our […]